Stepping up my soap-making game

By | September 13th, 2020|DIY Home, Handmade, Homemade Soap, Humbling Hobbies and Habits, Oh My Crafts!|

Flamingo, Leaf and Flower Soap Charms

With the soap charms I made earlier, I mentioned I’d be doing something special with them. Now that I have an abundance of these little guys hardened and sitting ready on my countertop, I am stepping up my ‘melt and pour’, soap-making game and taking it to the next level by embedding them in more soap. If all goes well, you should see the fine details of the flamingo, palm leaves, cacti and ice cream inside a clear glycerin base. If you can’t see them, well… something didn’t go quite right. 

Embedded Soap Making

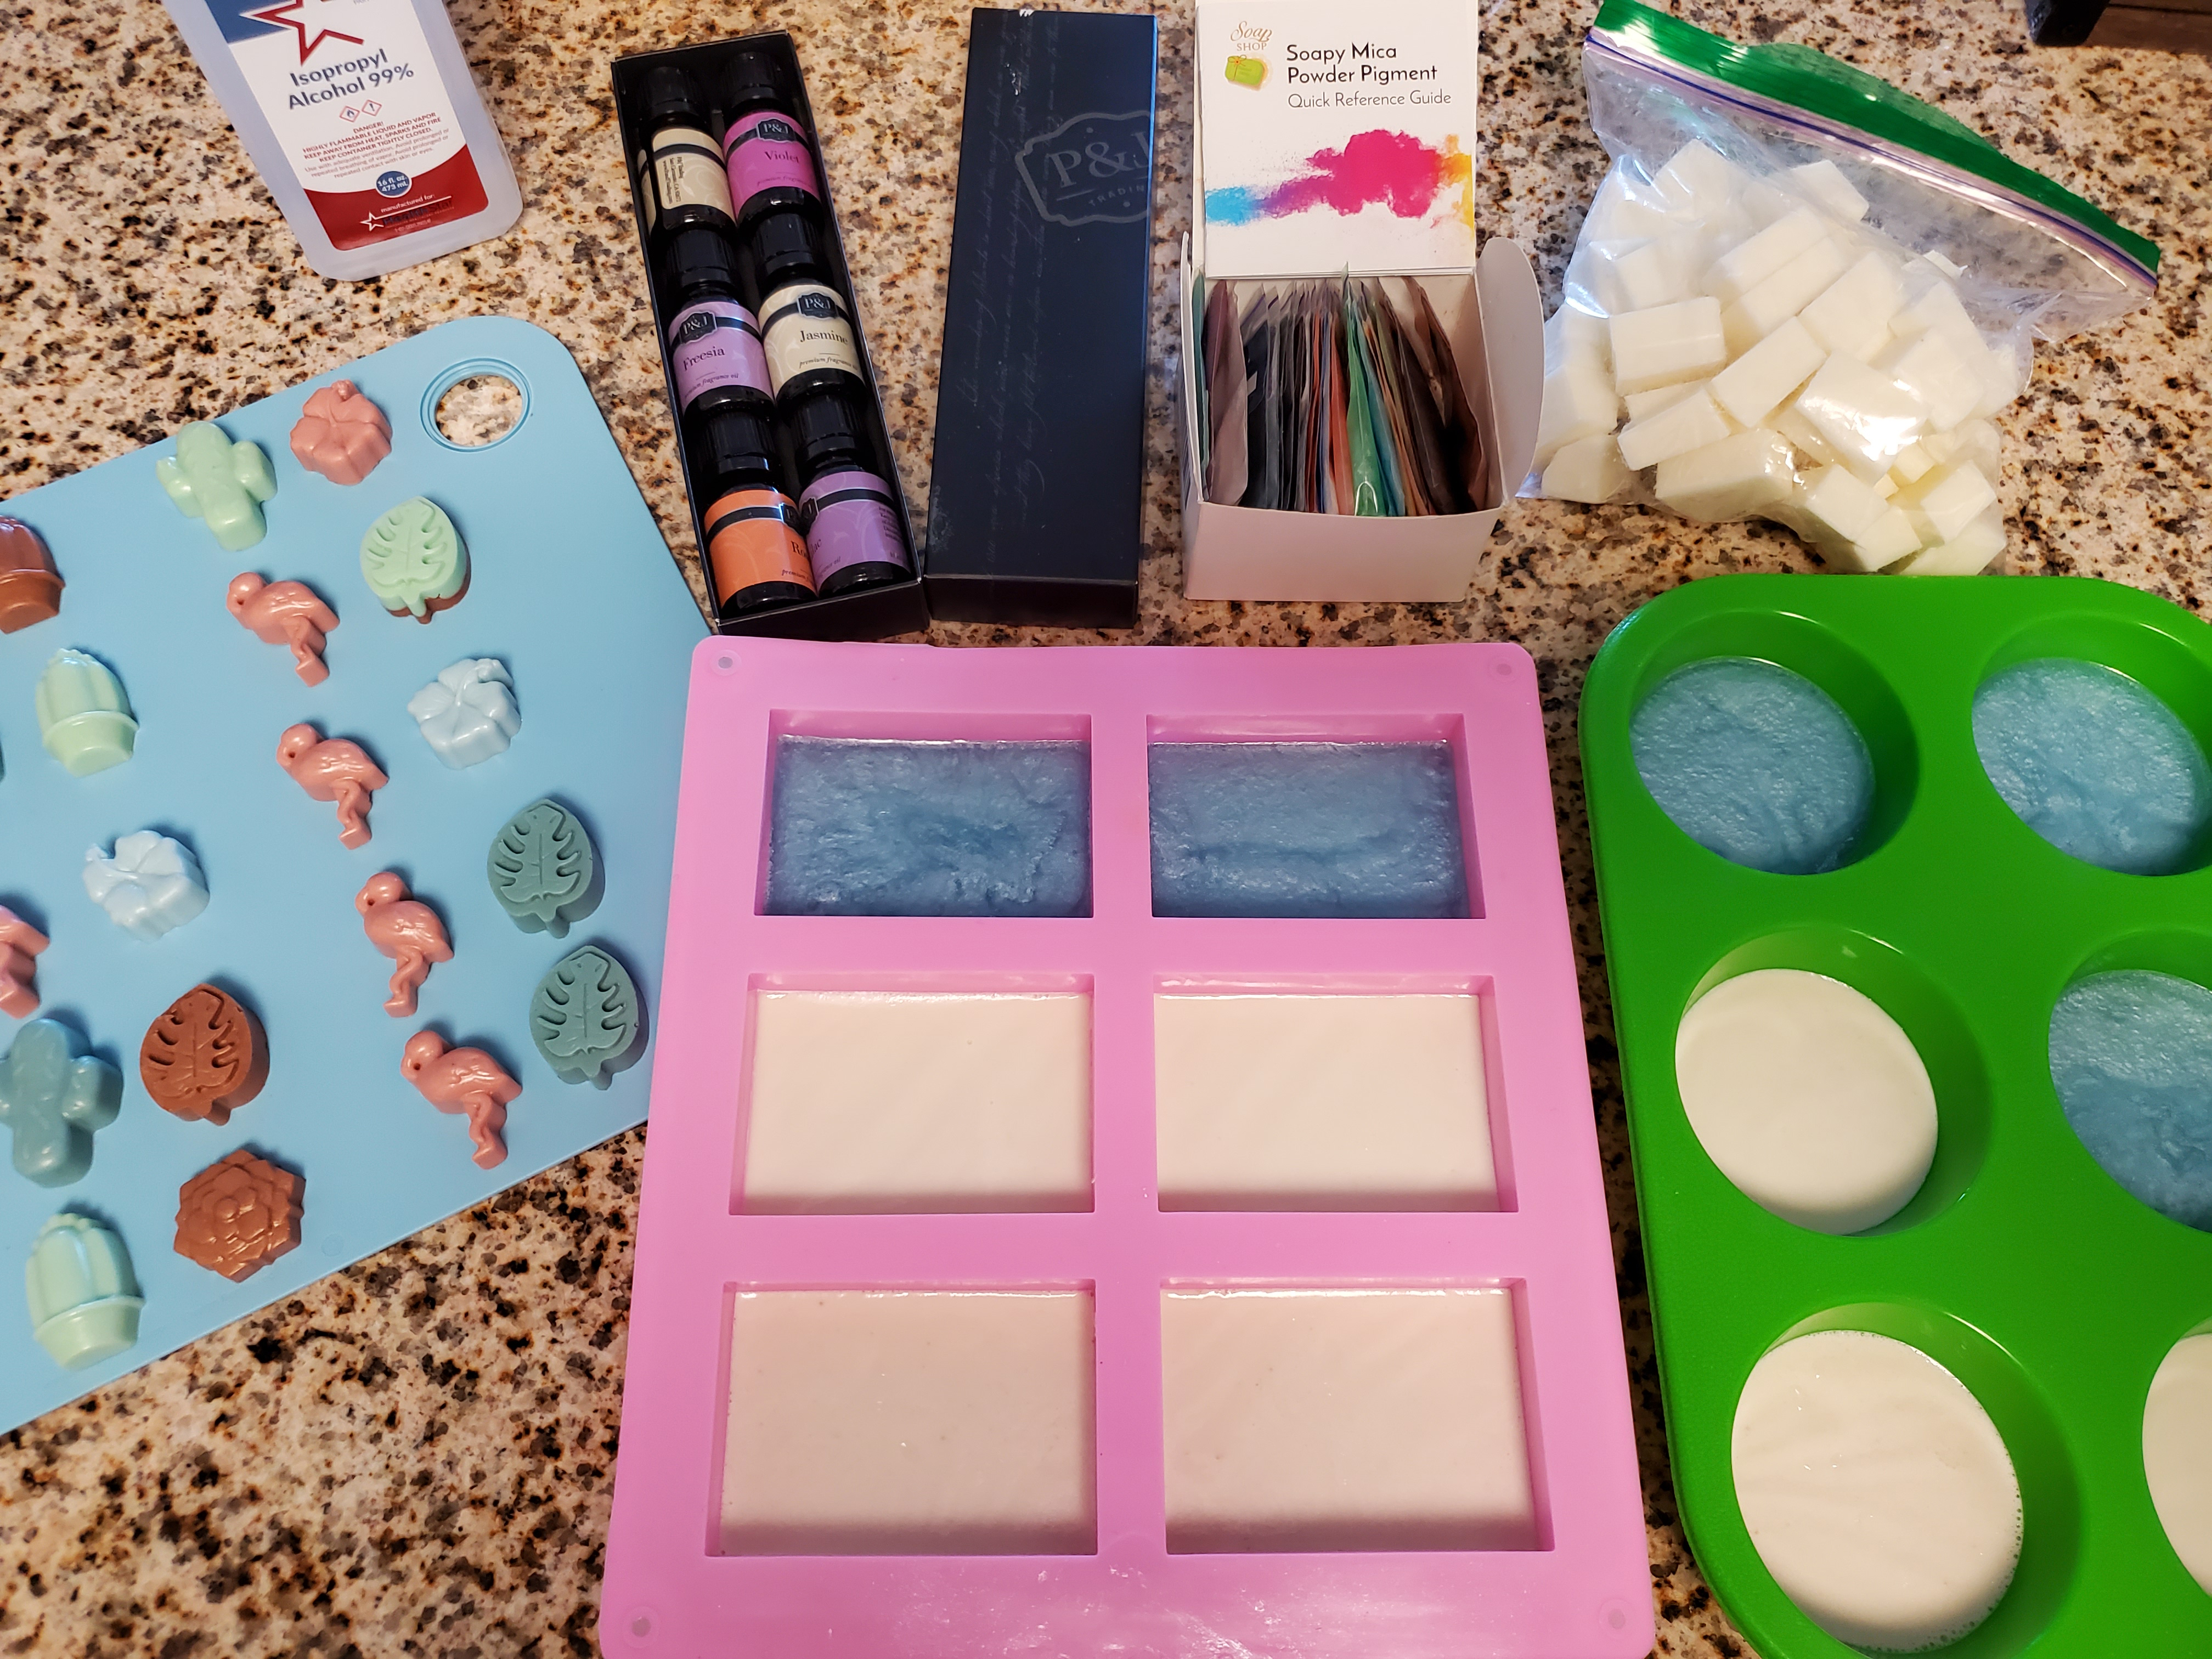
As a hobbyist, we all know it takes a few wrongs to get things right, so the sacrifice of a few flamingos and palm leaves were highly likely. The first batch of soap charms sat ready in their molds and I heated up the glycerin soap. The soap was near a boiling point, so I stirred out some of the air bubbles, then began to pour. Wrong move. 

Homemade Embedded Melt & Pour Soap Making

Shortly thereafter, the flamingo and palm leaf began to melt and ribbons of pink and green laced the soap tray. And not long after that the flamingo and palm leaf began to dissolve. Oh no, caught up in a frenzy, I tried to save it by scooping back parts of the pink and green ribbons to try to keep it intact. Was I successful? No. That first one was a goner.

Embedded Soap

The second time around, I heated up the next batch of glycerin soap and this time, I stirred and let it sit. I didn’t have a thermometer handy nor did I know how long to leave it out for. Every now and then, I poked my finger in. Too hot? No clue! Moments later, I began to pour the soap base in the tray only to find it thicken, cloud up and gel. It sat out too long. Doh.

Embedded Soap

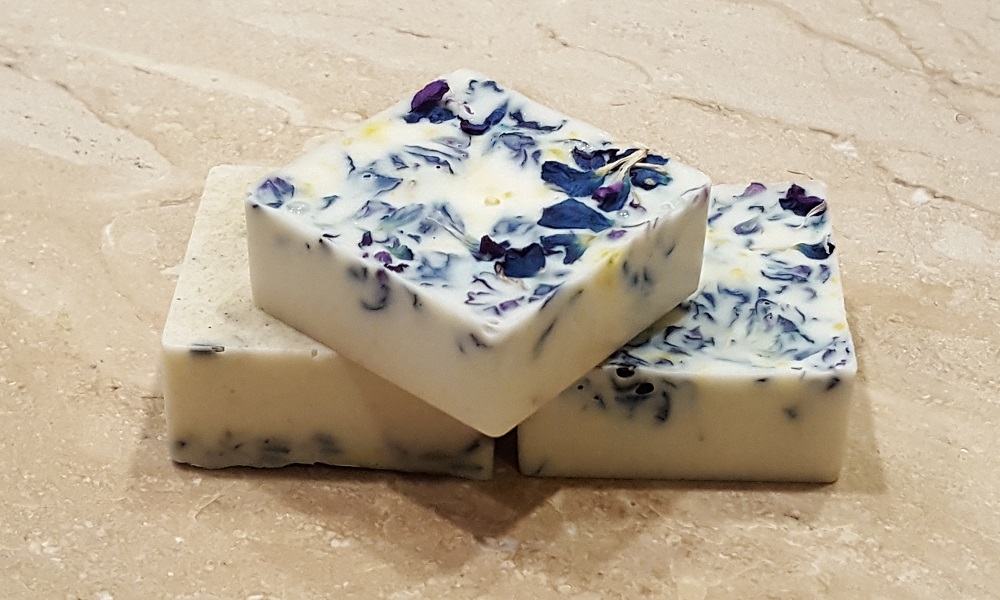
Third time’s a charm, right? Back to the stove, I stirred in another batch. I let it completely dissolve, then took it off the stove to stir out the air bubbles. I knew not to pour right away since it would melt the soap charms and now I knew not to leave it out for so long or it would thicken. It’s around that five minute range from what I could estimate, so then I dipped my finger in, acknowledged it was hot, but not overly hot. I took my chances and poured into the soap tray. It didn’t melt! However, I still didn’t know whether it would melt in time so I acted quickly. I poured in the rest, sprayed it with alcohol and transferred it to the freezer for three hours — all while hoping for the best. 

Homemade Soap

It worked. Ta da! 

Chocolate, fondant or soap?

By | August 21st, 2020|Homemade Soap, Oh My Crafts!|

Chocolate Fondant or Soap

Chocolate, fondant or soap? You tell me. If you guessed soap, you are correct. We’re whipping up soap charms in the Creative Jubilee kitchen. While you typically find silicon molds in the baking aisle at Michaels, there are so many creative ways you can use these silicon molds and one of which is making soap charms to embed in soap or to accompany larger soaps. 

A few of these silicon molds caught my eye. Who can turn down popsicles and ice cream cones in the summer? And flamingos, leafy greens and cacti, oh my! 

You approach this as you would with any Melt and Pour project. Pick your favorite base, grab your essential oils and some dye. In this case, I am using what’s left of my Oatmeal and Goat’s Milk soap and blending in some pinks, greens, blues and browns. You want colors that will pop and really show off the fine detail of each piece. 

Pop it in the freezer for a few hours and then you end up with these fun soap charms. For those of you who have kids at home or friends coming to visit, make sure to label them as S-O-A-P, otherwise… they’ll learn quickly that it’s neither chocolate nor fondant.  

Perfume-scented flower soaps

By | June 28th, 2020|Handmade, Homemade Soap|

Perfume-scented flower soap

It’s seventy-five and sunny and these flowers are in full bloom! 

In looking for more ways to make hand-washing a bit more enjoyable, I decided to make these perfume-scented flower soaps. Given that we all wash our hands more frequently and take extra precautionary measures to rid ourselves of those pesky germs, why not do it in style?! 

It starts with finding a soap mold that will make your soap feel like the centerpiece of your bathroom. I found these flower soap molds online and love that they accentuate every beautiful feature of a flower from the pollen-filled center to the delicate flower petals to the luscious leaves. And because we’re washing our hands more often, you’ll want to choose a base that not only lathers but moisturizes and smooths your skin. Shea butter does all of the above and is naturally a good choice. It also has anti-inflammatory and healing properties that condition, soothe and tone your skin. 

You can buy a block of shea butter and melt and pour as your please. Then you’re off to the fun part: colors and scent. Neutrals and earth tones go well in just about any bathroom. And because summer reminds me of jasmine, gardenia and lilac, it was only natural to add a few extra droplets of those essential oils.

It’s like making Jello

By | December 8th, 2019|DIY Home, Handmade, Homemade Soap|

Homemade Soap

Ok ok, I think I’ve got the hang of this soap-making thang. Grab the soap base of your preference — glycerin, Shea butter, goat’s milk, oatmeal, etc. Chop it up in cubes, throw it in a Pyrex and microwave. Then shake in your favorite essential oil, splash in a bit of color and pour into the silicone mold. This is the classic Melt and Pour soap-making technique in a nutshell and it makes for a great crafternoon because you’re just a few hours away from washing your hands with homemade soap you whipped up yourself.

Now that I have the basics, it’s time to get a little more creative. Since I’ve tried all four of the soap bases, I’m beginning to see the benefits of doing some mixing and matching. I really like the Shea butter for its smooth texture and glycerin for  the opacity which exposes the vibrant colors of the pigment. In this case, I’m using three colors: Haze, Powder and Black Sea from Soapy Mica Powder Pigments. With the powder, you really need to blend it well when you mix it in the melted soap base otherwise you end up with clumps of powder that gather at the bottom of the soap mold (which can end up being the top at times). 

Homemade Soap, Melt and Pour Soap

It’s almost like making Jello. I made a batch of the glycerin soap and poured it into the mold. Each batch went straight in the freezer to set while I mixed in different colors to the glycerin base. Then, it was time to melt the Shea butter and pour it right on top of the glyercin soap when it hardened. This added layer gave it definition and got many ‘oohs and awes’ when I took it out.

If you’re beginning to make some of your gifts or throw them in stalking stuffers, these make a beautiful present for the entire family to enjoy!

Soap-Making Sunday

By | September 22nd, 2019|Handmade, Homemade Soap, Oh My Crafts!|

Natural Homemade Soap Squares

After having made a handful of dish and hand towels earlier in the year, it’s time to pair them with homemade soap. This is my second go around at making soap using the melt and pour method, and I’m loving it. It’s simple to make and it has minimal cleanup effort. This time, I picked out a block of Shea butter and glycerin soap. Then I went ahead and shopped around my pantry for oatmeal, flowers and other natural ingredients. I’m excited to see how the texture pairs with the soap base. Unfortunately, I was out of coffee beans. How is that possible?! Next time!

Natural Homemade Soap Squares

While I’m a big fan of splashing a bit of color and dye into the soap base, I decided to take a minimalist approach with the glycerin to give it more of an all-natural, homemade feel. I really like how the oatmeal sits with clear glycerin; it’s just got this amazing texture and hearty, healthy wholesome feel. Then I threw in some blue hydrangea into another glycerin cube, but wasn’t as pleased. It turned out a little darker than expected and a few days later, it become even darker. I’m eager to try mint leaves next time to see how the color holds up.

With the Shea butter, I added pink, purpler and yellow dye along with some pressed flowers and rose petals. Since the feedback I got last time was it wasn’t as fragrant as store bought soap, I was more generous with my essential oils and added a few more drops than I normally would. Hopefully, that did the trick.

Overall, I think they turned out good. Stay tuned for my next soap-making adventure!

Homemade Slippery Soap Squares

By | March 24th, 2019|DIY Home, Handmade, Homemade Soap, Oh My Crafts!|

Hydrangea and Lavender Soap Squares

Okay, so I’ve watched one too many videos on BuzzFeed and this video on making your own DIY aromatherapy soap finally made me do it. I dropped everything I was doing, pulled up Amazon, and Amazon Primed myself all the stuff needed to make homemade soap. For someone who loves DIY projects and gets a little anxious about having all the right materials, the starter kit for making soap wasn’t too bad. I shopped around for the soap base first. There is a lot to choose from. You can get clear glycerin, goat’s milk, oatmeal and one of my favorites, Shea butter. I decided to go with an oatmeal base, since I wanted to it to be textured and all-natural looking. I knew for this first go around, I was going to use dried flowers and rely little on added coloring.

Hydrangea and Lavender Soap Squares

For the flowers, I decided to buy myself a mixed bouquet from the market. Yes, I buy myself flowers! I love the idea of having fresh flowers in the house. The color, the scent and just the idea of having something alive in the room really just brightens up your day. It’s sad when they die, but now I know how to make full use of them. I took the flower petals and set them aside so that they would dry. This batch had blue hydrangeas and others that I’d save for a later time. I also had a sash of dried lavender that my mom got from her vacation that I thought would be great for this project.

Hydrangea and Lavender Soap Squares

With the dried flowers ready, I went ahead and bought the rest of the ingredients: soap mold, a pack of essential oils and alcohol spray. Since I was doing Melt and Pour, you literally just had to cut the block of soap into cubes and melt it over a pot of hot water. It took about ten minutes to melt, but make sure to keep an eye on it and keep stirring so it won’t scald.

While the soap was melting, I stirred in lavender and lemongrass essential oils. Then I sprayed the soap molds with alcohol and drizzled in the dried hydrangea and lavender. Once the soap base was completely melted, I poured them into the soap molds and then popped them straight into the freezer for about four hours. I think I poked and prodded them at the two hour mark just to see how they were doing. They were rock hard, but you can tell they were still setting.

Four hours later, you’ve got soap that you can proudly use!