Jewelry Making 101

By | July 18th, 2015|Handmade, Jewelry Making, Oh My Crafts!|

Jewelry-Making 101 - Pendants

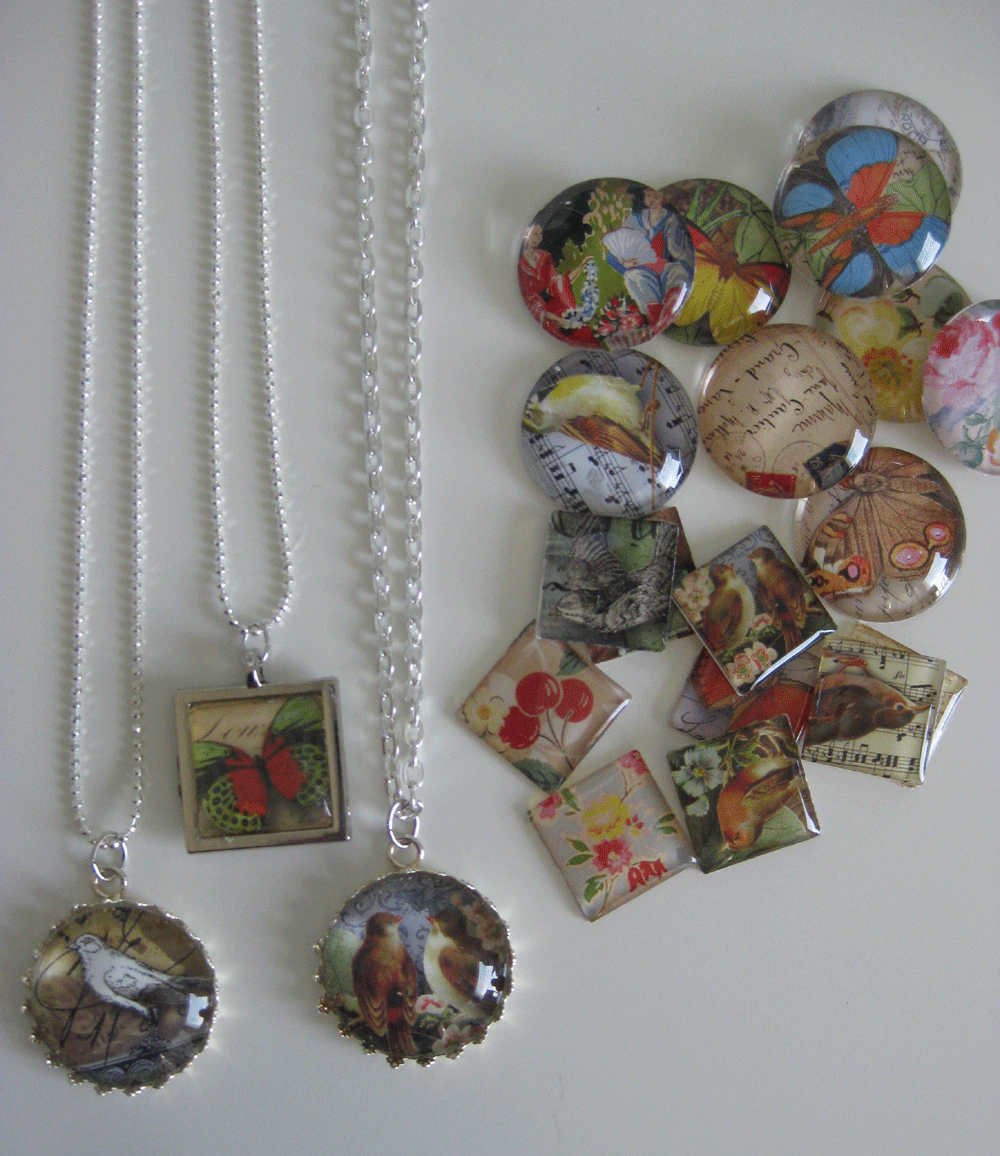
It’s unlike me to walk out of Scrapbook Expo without a handful of craft supplies, glue dots, paper stock and maybe even a new hobby. After a ‘Make & Take’ sesh with Craft Fantastic, I left with a bag of goodies to make these beautiful pendants. I see these charming, vintage style pieces in many boutique stores and always wondered how I could make my own. Well, now that I’ve got the supplies and couple sheets of decorative art paper, I’m looking forward to getting crafty and making these to go with a couple of gifts I’ve set aside for some friends.

My starter kit includes an assortment of pendant trays with matching chains, glass cabochons, ephemera paper and Glaze & Glue (aka acrylic goop). It’s super easy to make. You take a glass cab and put a few drops of Glaze & Glue to cover the surface. Then you select an image from your paper stock and press the glass cab over the image. Use a cotton swab to remove the excess glue. Once it is dried, you can use scissors to cut the image down to size to match the shape of the glass cab. Once that’s done, adhere the image and glass cab into the pendant tray and you are done. Put a chain around it to turn it into a necklace or string it to a card or album as a scrapbook embellishment and you’ve got yourself a custom and unique piece. Print your own photos of your family or pet and you’ve got a commemorative piece. It’s that simple!


Butterfly Pendant
Here is a butterfly pendant I made for a friend’s daughter. On the back, I customized it with her initial.

If you want to make your own, you can visit Craft Fantastic’s site and get your own starter kit where you can select your own pendant trays, chains and paper stock. They even have supplies to make bracelets and earrings.

And Finally, It’s Done!

By | November 8th, 2016|Crocheting, Handmade, Humbling Hobbies and Habits, Oh My Crafts!, Yarn Addict|

Granny Square Crocheted Blanket

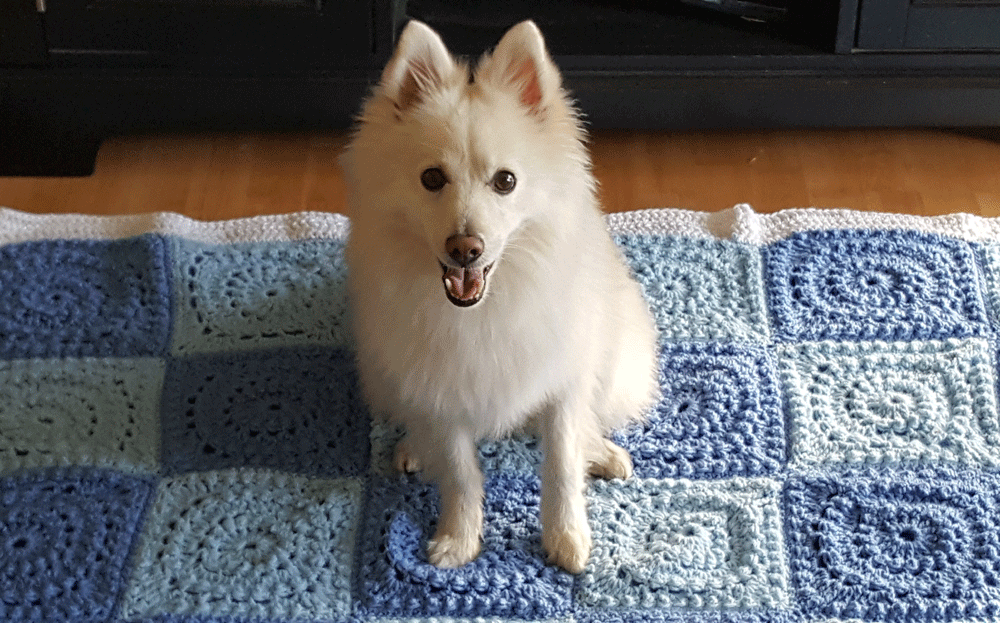
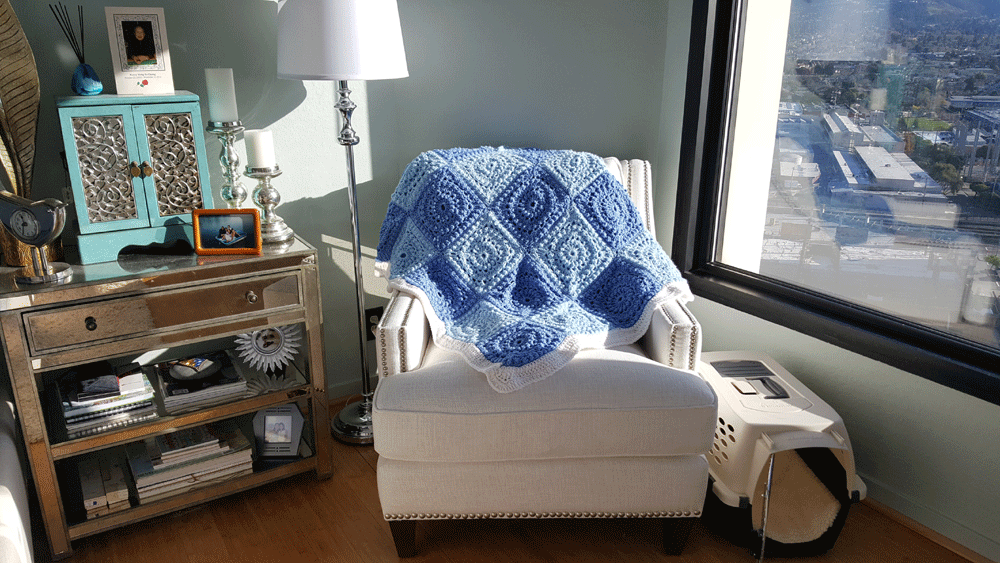
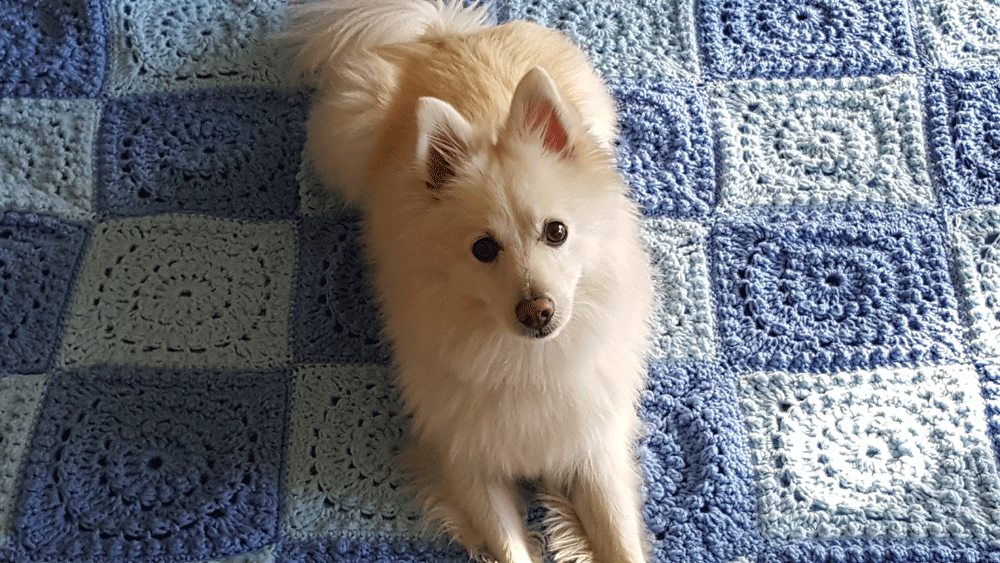
Cooper, I’m glad that you find my crocheted blanket so comfy.  Now please scoot over, so I can finally wrap this up. It’s taken me years, well  probably a decade with all the breaks I took from making this blanket. This was a my very first crochet project that got me started on scarves, towels, amigurumi and other accessories. I’m especially thankful  to the lady who taught me this granny square pattern in my good old days of working for a real estate company. This pattern is rich with a combination of stitches and taught me single, double and treble crochet along with the ‘popcorn’ stitch. I am proud to say I can now do this pattern with my eyes closed  and my hands tied  behind my back. A whopping seventy squares later, plus a few extras on the side for practice of course, I am finally done.

Granny Square Crocheted Blanket

All in all, I didn’t mind crocheting the single squares as I did sewing them together and weaving in the loose ends. In reality I think it was the combination of light blue and dark  blue that had me dizzy at times. With the help of my cousin, I was able to sew this blanket together. The final test of sturdiness was throwing this baby in the washing machine and praying that it didn’t fall apart.

Granny Square Crocheted Blanket

In the end, it came out the same way it went in, intact and in one piece. However, I did have to mend a few strands, but other than that,  it is one big throw that I’m gifting to my parents for Christmas. I honestly can’t track the number of hours spent on this blanket, but it is no comparison to the number of hours, weeks, months and years that my parents have spent on me. I hope they like it.

Pumpkin Carving Galore

By | October 29th, 2016|Craft Day, Holiday Fun, Humbling Hobbies and Habits, Oh My Crafts!|

Kids Pumpkin Carving

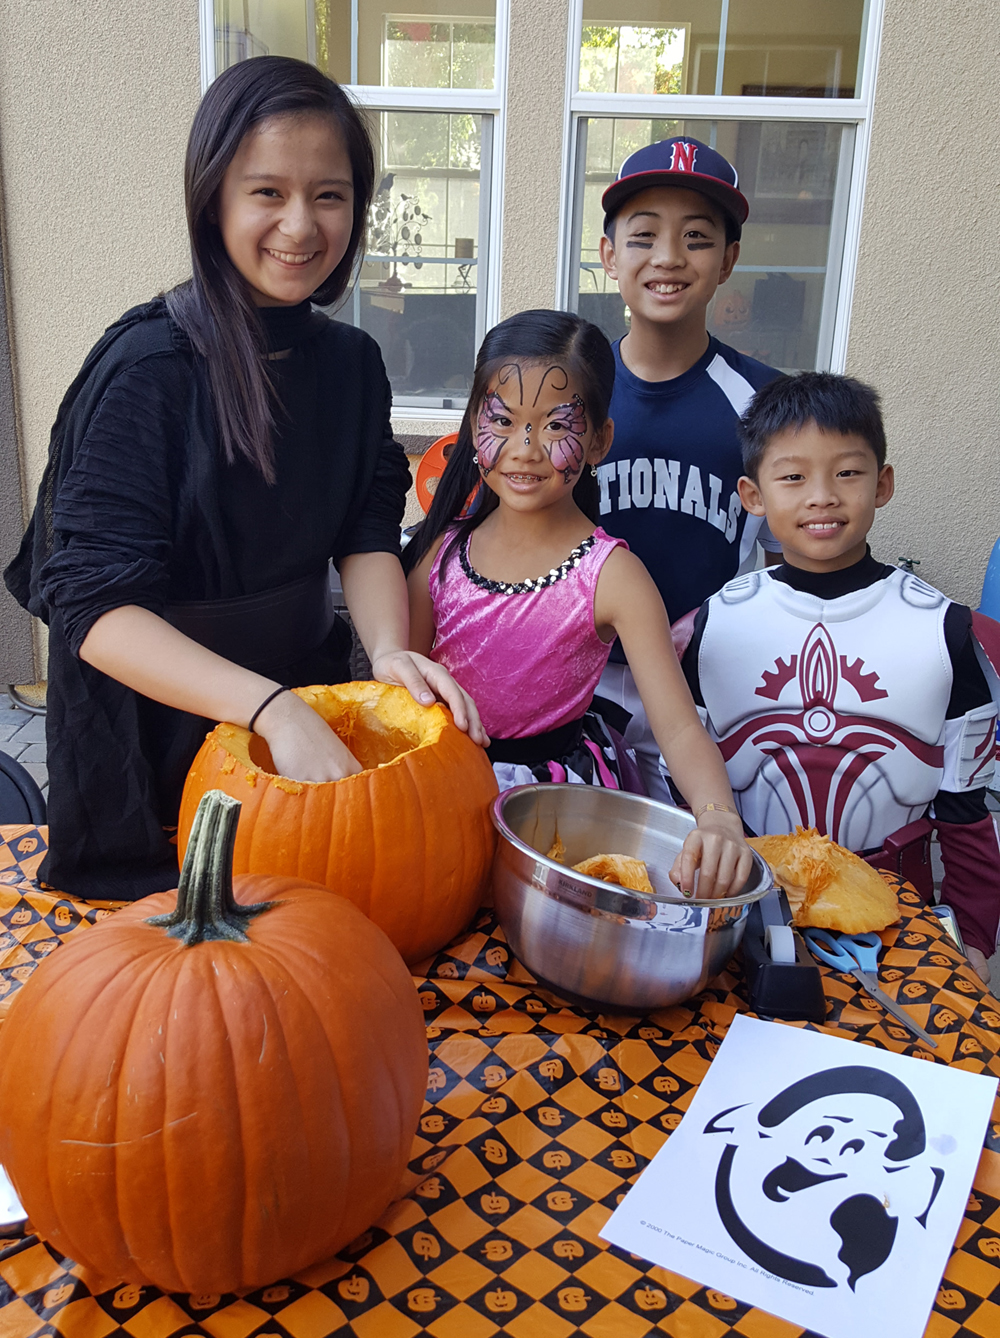
It must of been in high school or grammar school when I last carved a pumpkin, so I might be a little rusty. In fact, I think I might need a lesson or two from the kids who seem to be pros at picking out their pumpkins, coming up with a design and digging right in. With over ten kids in the house at a pumpkin per kid, I’d say we have quite a lot of work to do. But with a cup of sangria/fungria, anything is possible this Saturday afternoon.

Miss Kendall was nice enough to let me partner with her. We got our stencil, pumpkin-carving tools, a bowl and some clean hands. She dove right in and carved off the stem like a pro, while I stood to the side with my sleeve up ready to take her cue. Since she did such a good job with hers, she was in high demand with all the other kids to help them remove their stems. I continued to gut the pumpkin and separate the seeds, so we can roast them in the oven later for a tasty treat. Afterwards, she came back to create an imprint of the stencil by poking a series of holes to align with the ghost design. Since we gutted the pumpkin to its core, it made it a lot easier to puncture because the walls weren’t as thick. The kids considered that the fun part.

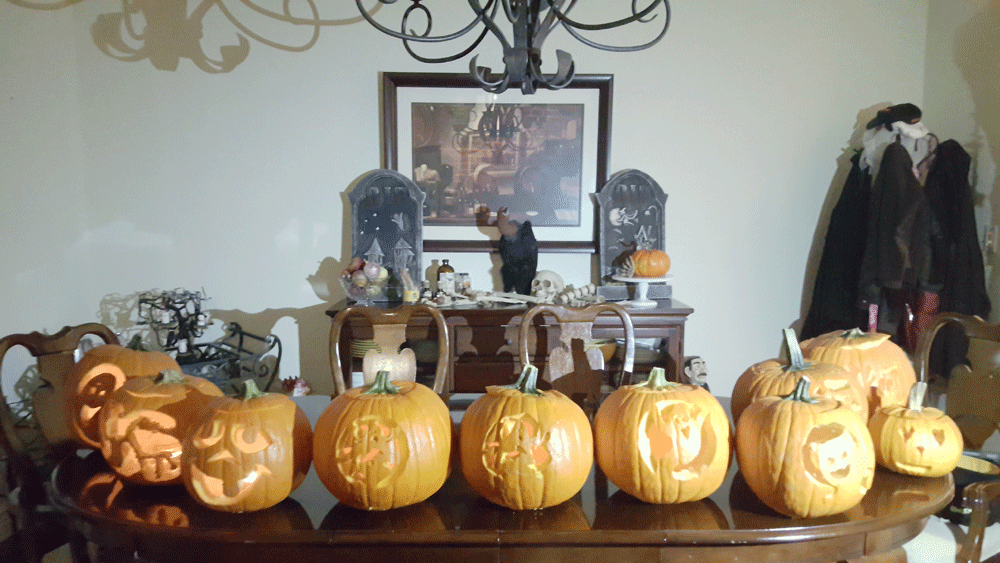
Our Collection of Carved Pumpkins

It took us into the early evening to finish and by nightfall. We ended up with ghosts, black cats, witches, bats and classic jacks. Wow, pumpkin carving is a lot of work. Thank goodness for the kids. Now it’s time to admire all the hard work and sweat, and top them off with a tea candle.

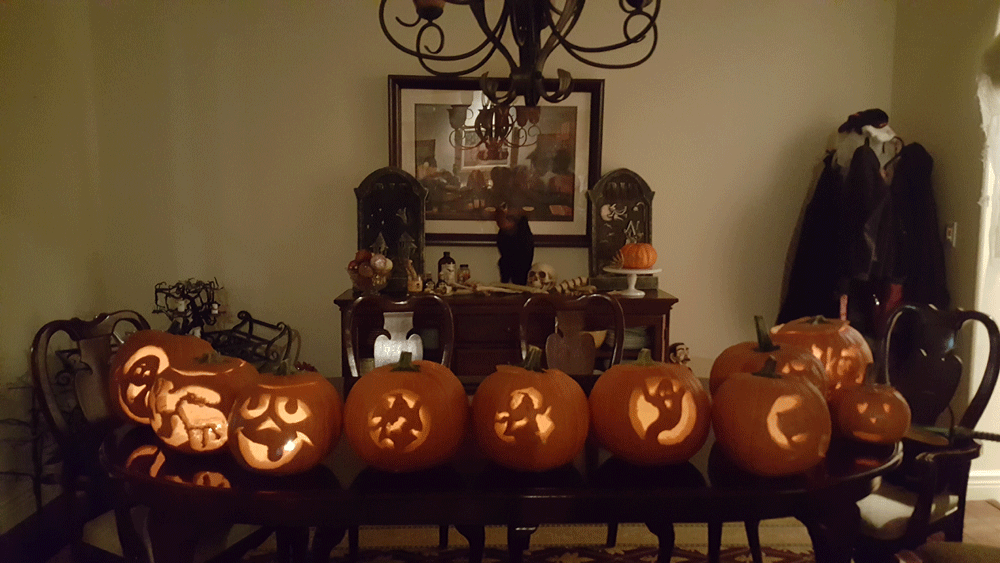
Our Collection of Carved Pumpkins

Lights on, lights off. Here is our pumpkin line up for the evening. Hope you have a Happy Halloween!

Scrapbooking with Maya Road

By | August 6th, 2016|Handmade, Humbling Hobbies and Habits, Oh My Crafts!, Scrapbooking|

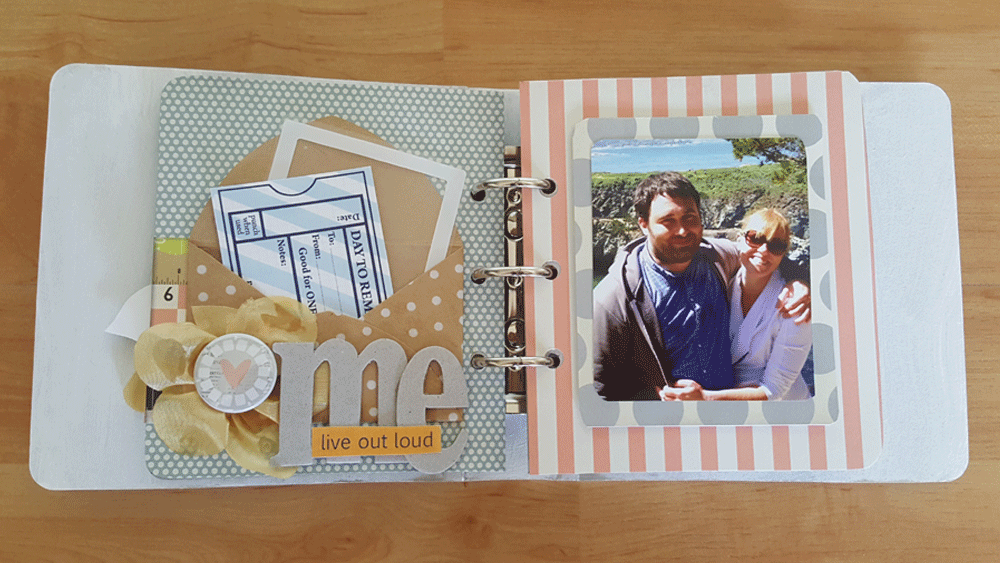
Maya Road Scrapbook Album

As with every Scrapbook Expo, I’m completely overwhelmed by hundreds and thousands of paper stock, stickers, ink, tape, glue dots, scissors and card-making machines that jump out at you at every direction as you enter the expo. My eyes dart back and forth from one scrapbook vendor to another and I find myself at the mercy of my wallet. If I come to Scrapbook Expo without a project in mind, I’m in trouble. I’ve gone from buying jewelry-making kits to acrylic albums to card stock to those fancy Copic markers. In fact my storage bins are spilling out with all these newfound hobbies that I should actually get moving on the handfuls of projects that I have already started. We all know that completing projects are a lot easier when you have a date appended to them and this time, I do!

Maya Road Scrapbook Album

Speaking of ‘I do,’ Kari and Richard’s wedding is just months away, I’m on the hook for a bachelorette present, something a little different from all the others. I’ve been intrigued by many of the scrapbook albums I’ve come across. Button Farm and Clear Scraps are a few of my favorites, and recently, Maya Road grabbed my attention.

Maya Road Scrapbook Album

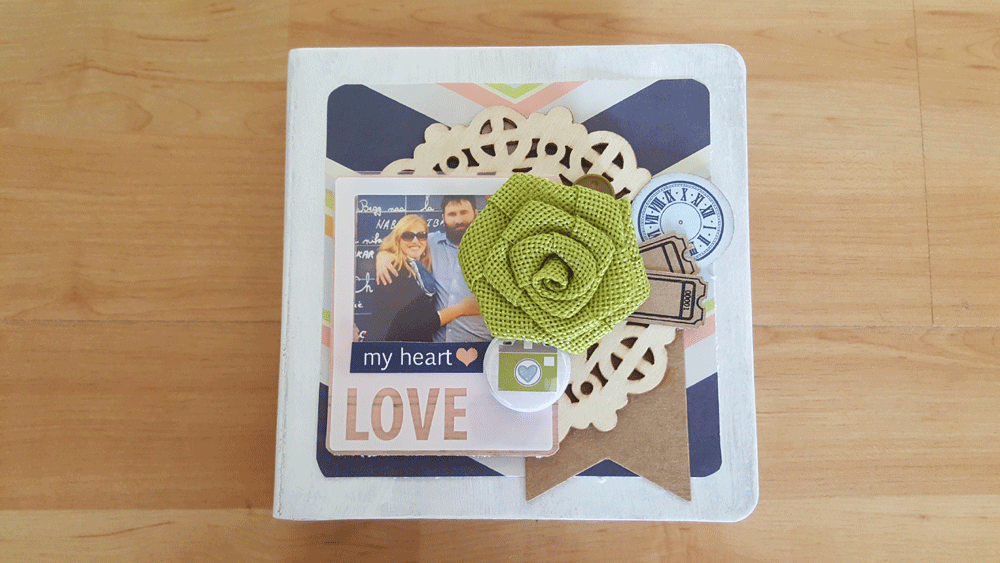
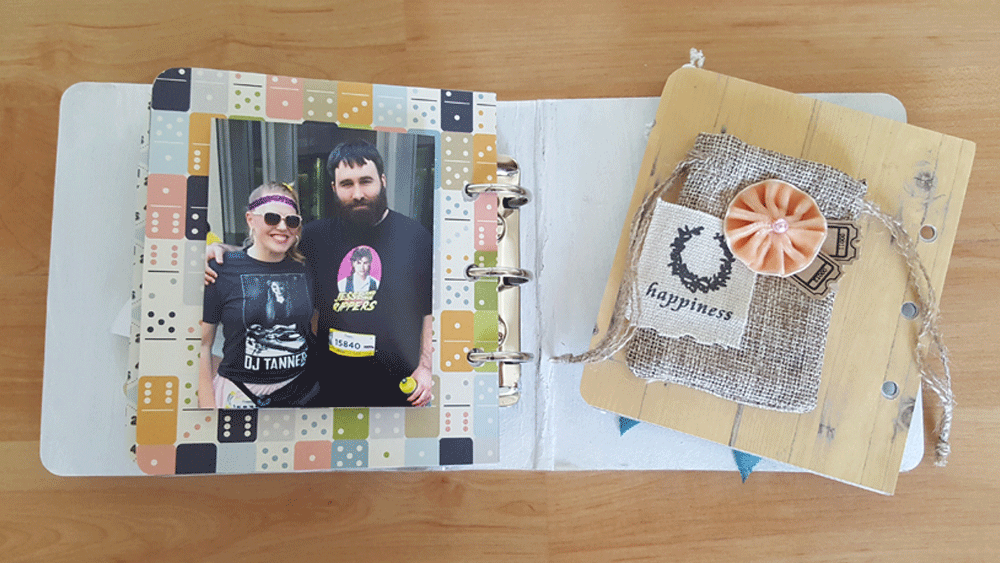
As I came across Maya Road’s booth, I flipped through their album and was drawn to their mesh flower and needle work ‘make and take’. After a hearty ten minutes with the hot glue gun, I walked away with a solid embellishment to pop into my album. Combining a mesh flower with cardboard cut-out pink letters, needles and a spool of thread gave me a few ideas to stretch my scrapbooking creativity and skills. I was very happy with the embellishment and decided to pick up this Maya Road album kit for Kari’s bachelorette gift. It took quite a few hours to put together and I learned how to combine different textures and layer patterned paper on top of each other. Each page of instruction was a new adventure and a new technique.

Maya Road Scrapbook Album

The best part of this project was not just putting together the page, but it was inserting photos of the happy couple. I can’t wait to give this to Kari. I hope she likes it!!

Mother’s Day Tote from Cooper

By | May 8th, 2016|Holiday Fun, Oh My Crafts!, Scrapbooking|

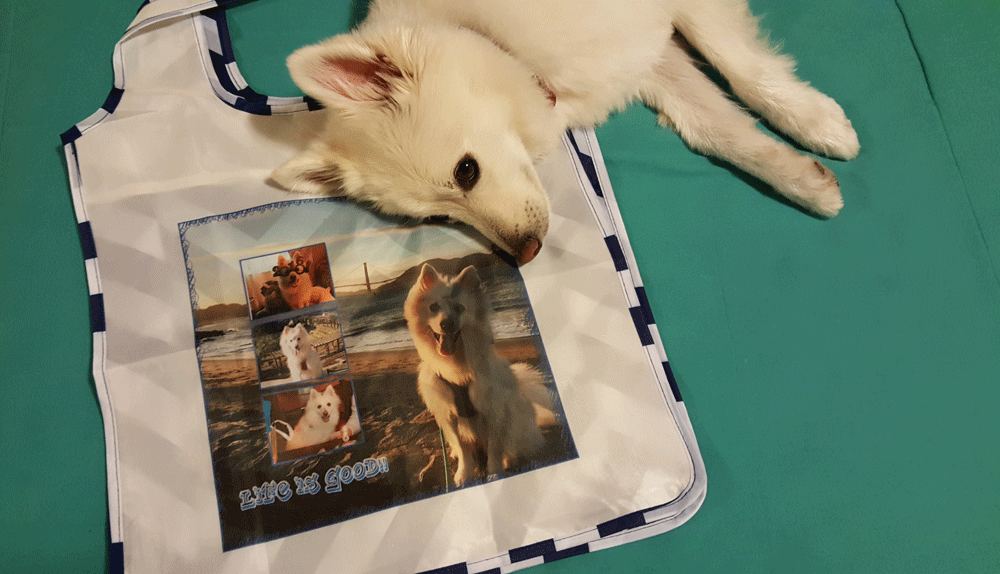
Shutterfly Tote of Cooper Crazy Lee

Mother’s Day was extra special this year due to this unexpected surprise from my very own, Cooper Crazy Lee (aka Susanna). Since we’re all trying to go ‘green,’ my sister decided that carrying a tote featuring photos of us or the family might not be as appealing as carrying a tote of our four-legged, furry canine friend. I’m going to have to agree with her on this one and since neither one of us has kids (yet), she made a ‘Cooper photo bag’ for me and my mom (aka ‘Grandma’) and I absolutely LOVE it!!

Susanna went ahead and cherry-picked out a few photos of Cooper during his most photogenic moments. Well, when is he not photogenic?! The three to the left (from top to bottom) include a photo of Cooper on New Year’s Day wearing his 2016 shades, another one of him at the Berkeley Rose Garden and another one of him on his sixth birthday ready to blow out the candle on his ‘doggy’ cupcakes. And to the right is Cooper on his scavenger hunt for the Superbowl 50 sign over by the Marina. Cooper’s been on quite a few adventures and I’m more than grateful to now ‘carry him around’ and have him with me on the go.

Thanks so much Susanna and Cooper for the lovely tote!

Rainy Day Scrapbooking in Pleasanton

By | March 5th, 2016|Oh My Crafts!, Scrapbooking|

Scrapbook Expo Pleasanton 2016

With the rain coming down hard, it makes it an ideal afternoon to scrapbook at Pleasanton’s Scrapbook Expo. As Susanna and I were wheeling in our rollers, scrapbooking projects and mini fridge, we ran into a few fellow scrapbookers that we met over four years ago. It was quite a pleasant surprise. We each pulled out the group photo we took last time and agreed it was necessary to take another photo this year with the exact same pose, so we can begin a new memory together. The funny thing about running into them was that I’m still working on the 2011 album that I was working on when I met them. I had just set aside the book for a couple of years while working on a few other projects and ironically, decided to pick this one back up at this event. My goal is to finish projects before beginning new ones and it looks like I have all day and night to do it.

Coffee and Cookie, Anybody?

By | February 28th, 2016|Amigurumi, Craft Day, Crocheting, Handmade, Oh My Crafts!, Yarn Addict|

Amigurumi: Coffee and a Cookie

It’s craft day and a gal with a sweet tooth like myself couldn’t resist this amigurumi project, especially since I wake up nearly every morning with a cup of coffee and a cookie. Perhaps waking up to this set in my kitchen will curtail the ‘cookie monster’ craving from within.

As with many amigurumi patterns, this one required quite a bit of counting and sewing to put the pieces together. The pattern itself wasn’t very challenging, though I did have to re-make the handle of the coffee cup twice, since I miscounted. These little guys make me smile and make the perfect gift for a coffee lover.

Merry Christmas from the Lee Family

By | December 25th, 2015|Handmade, Holiday Fun, Oh My Crafts!|

Lee Family Christmas 2015

My cousin walked through the door and asked, “What games will we be playing this year?” My sister and I were absolutely thrilled that games were a big hit from last year – so thrilled that we’re doing it again this year prior to dinner and presents so that everybody can and will participate.

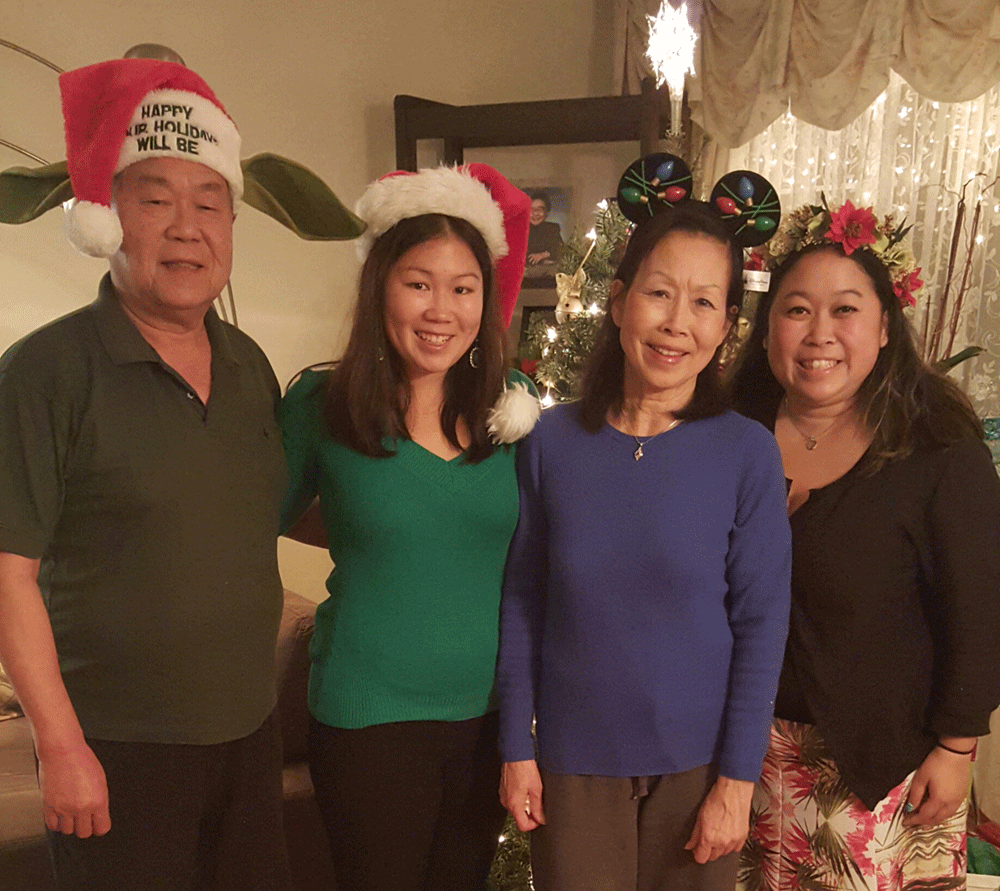
The first game was wrapping a box with a partner of your choice. Each pair was given the same materials: scissors, wrapping paper, a box, tape and a ribbon. The only requirements were to wrap a Christmas present using one hand of yours and one hand of your partner’s. And the team to wrap their box the fastest and make it the most presentable wins. My parents were one team, while my cousins paired with their significant others and my aunts paired with each other. When we gave them the green light, the teams went at it. Across the board, you can probably see the women taking the lead, doing the cutting and taping while the men were good at taking direction. You can also notice that hands sometimes got a little twisted as they led over verbal communications. There was a lot of energy and tension to get this small box wrapped. Sometimes you even saw four hands to a box over two. My parents were taking the lead. There was no surprise there, since my Dad started telling the story that he’d been with my Mom for over forty years and you just sort of ‘pick up’ on these things. In the very end, it looks like the years of experience and partnership triumphed as my Mom and Dad won the competition. They got crowned Mickey ears and Santa hats along with some sweet treats. Congratulations, Mom and Dad!

Gingerbread Houses for Christmas

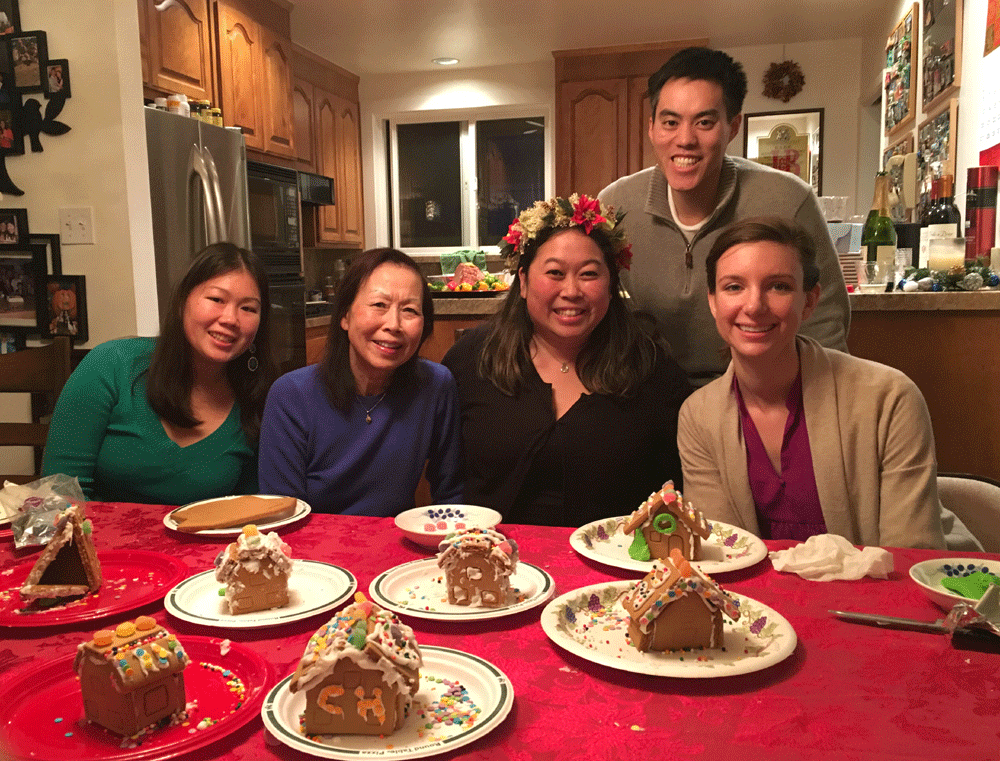
For the second game of the evening we decided to bring back the gingerbread making houses – an all time favorite. Instead of teaming up to build larger gingerbread houses, we each got our own mini gingerbread house. Assorted gum drops, m&ms, confetti and icing were available to dress each person’s house to their liking, that’s if they can even put together the foundation of the house. After a few attempts at the icing, my hands were sticky and white. The walls could barely hold the roof, which could barely hold the candy. Yikes, mine looked like a snowstorm hit San Francisco. Clifton filled his house with candied windows along with his initials on the rooftop. Bernice made cute little snowmen, xmas trees and a dog. My Aunt Julie couldn’t help but try to copy my cousin in putting together the base of the house, where my Mom was concerned with decorating the rooftop. Jeffrey got his hand all muddied up in icing, while Laura seemed to have the magic touch to making the house look homey. In the end it was unanimous and Laura took home the trophy for the best looking gingerbread house in town. A concession prize went to my Aunt who didn’t even get her house to stand. What a fun evening that was and you still have Clifton in the background claiming he too is deserving of a prize – any prize.

What a fun evening of games.  I think we all worked up an appetite. Now onto to dinner, presents and more festivities. I hope your Christmas is just as exciting, warm and eventful as ours.

Wishing you a very Merry Christmas from the Lee Family!